Kubernetes APIs and Access

The entire Kubernetes architecture is API-driven, the main agent for communication (internal and external) is the Kubernetes-apiserver. There are API groups that may have multiple versions and follow a domain-name format with reserved names such as the empty group and names ending in .k8s.io.
View the API groups with a curl query:


$ curl https://127.0.0.1:6443/apis -k
….
    {
      \”name\”: \”apps\”,
      \”versions\”: [
        {
          \”groupVersion\”: \”apps/v1beta1\”,
          \”version\”: \”v1beta1\”
        },
        {
          \”groupVersion\”: \”apps/v1beta2\”, 
          \”version\”: \”v1beta2\”
        }
      ],
     },
….

Make the API calls with kubectl (recommended) or use curl or other program providing the certificates, keys, and JSON string or file when required.

curl –cert userbob.pem \\
  –key userBob-key.pem \\
  –cacert /path/to/ca.pem \\

It\’s important to check authorizations. Use kubectl to check authorizations as administrator and as a regular user (i.e. bob) in different namespaces:

$ kubectl auth can-i create deployments
yes
$ kubectl auth can-i create deployments –as bob
no
$ kubectl auth can-i create deployments –as bob –namespace developer
yes

There are 3 APIs which can be applied to set who and what can be queried:
  • SelfSubjectAccessView: Access view for any user, useful for delegating to others.
  • LocalSubjectAccessReview: Review is restricted to a specific namespace
  • SelfSubjectRulesReview: A review shows allied actions for a user in a namespace
The use of reconcile allows a check of authorization necessary to create an object from a file. No output means the creation would be allowed.
As mentioned before the serialization for API calls must be JSON, all files in YAML are converted to and from JSON.
The value of resourceVersion is used to determine API updates and implement optimistic concurrency which means an object is not locked from the rime it has been read until the object is written.
The resourceVersion is backed via the modifiedIndex parameter in etc and it\’s unique to the namespace, kind and server. The operations that do not modifiy an object such as WATCH and GET, do not modify this value.
Annotations allow to add metadata to an object, they are key to value maps. Annotations can store more information and in human-readable format, labels are not.

Push container image to Azure container registry

In this tutorial, we will learn how to push local container image to Azure container registry. You may refer this article to know more about container image creation: Create Container image

NOTE: We will use Azure CLI hence install Azure CLI version 2.0.29 or later. Run az –version to find the version.

  1. Select your subscription. Replace <> with your subscription id

az account set --s <>

  1. Create resource group

az group create --name  --location 

Example:

az group create --name helloworldRG --location westeurope

acr1

  1. Create Azure Container registry. Replace with unique ACR name

az acr create --resource-group   --name  --sku Basic

Example:

az acr create --resource-group helloworldRG --name helloworldACR1809 --sku Basic

acr2

  1. Log in to container registry

az acr login --name <>

Example:

az acr login --name helloworldACR1809

  1. Tag container image

To push a container image to Azure Container Registry, you must first tag the image with registry\’s login server.

Run the below commands:

docker images

image2

Tag container image

docker tag  /:

Example:

docker tag helloworldapp helloworldacr1809.azurecr.io/helloworldapp:latest

acr3

Run docker images to validate tagging operation.

  1. Push Image

Example: docker push helloworldacr1809.azurecr.io/helloworldapp:latest

acr4

  1. Verify the container image in ACR

az acr repository list --name --output table

Example:

az acr repository list --name helloworldacr1809

Create Container image

In this tutorial, we will learn to create an image of an application. This application is a simple web application built in node.js. Follow the below steps to create an image of this application:

  1. Copy the application\’s repository.

git clone https://github.com/ashish993/helloworld.git

  1. Build the container file. The below command will create container image & we will tag it as helloworldapp

docker build .\\helloworld -t helloworldapp

image1

  1. Check docker images. Run the below command and it will list all the docker images.

docker images

image2

  1. Run the container locally.

docker run -d -p 8080:80 helloworldapp

  1. Navigate to http://localhost:8080 in your browser. The web page will be opened as shown below.

image3

Comparison between Azure Application Gateway V1 and V2

Microsoft has announced new version of Azure Application Gateway and its Web Application Firewall module (WAF). In this article, we will discuss about the enhancements and new highlights that are available in the new SKUs i.e. Standard_v2 and WAF_v2.

Enhancements and new features:

Scalability: It allows you to perform scaling of the number of instances on the traffic.
Static VIP: The VIP assigned to the Application Gateway can be static which will not change over its lifecycle.
Header Rewrite: It allows you to add, remove or update HTTP request and response headers on application gateway.
Zone redundancy: It enables application gateway to survive zonal failures which allows increasing the resilience of applications.
Improved Performance: Improvement in performance during the provisioning and during the configuration update activities.
Cost: V2 SKU may work out to be overall cheaper for you relative to V1 SKU. For more information, refer Microsoft pricing page on V2 SKU costs.
The below table shows the comparison between Application gateway V1 and Application Gateway V2:
Features
v1 SKU
v2 SKU
Autoscaling
Zone redundancy
Static VIP
Azure Kubernetes Service (AKS) Ingress controller
Azure Key Vault integration
Rewrite HTTP(S) headers
URL-based routing
Multiple-site hosting
Traffic redirection
Web Application Firewall (WAF)
WAF custom rules
Transport Layer Security (TLS)/Secure Sockets Layer (SSL) termination
End-to-end TLS encryption
Session affinity
Custom error pages
WebSocket support
HTTP/2 support
Connection draining
Microsoft will disable the creation of new Application gateway on V1 SKU soon. So, you may refer this article: https://docs.microsoft.com/en-us/azure/application-gateway/migrate-v1-v2to migrate your existing Application gateway V1 to V2.

Creating Docker Images

The distributed systems that can be deployed by k8s are made up primarily of application container images.
Applications = language run time + libraries + source code
  • Problems occur when you deploy an application to a machine that doesn’t available on the production OS. Such a program, naturally, has trouble executing.
  • Deployment often involves running scripts which have a set of instructions resulting in a lot of failure cases being missed.
  • The situation becomes messier if multiple apps deployed to a single machine use different versions of the same shared library.
Containers help solve the problems described above.
Container images
container image is a binary package that encapsulates all the files
necessary to run an application inside of an OS container.
It bundles the application along with its dependencies (runtime, libraries, config, env variables) into a single artefact under a root filesystem. A container in a runtime instance of the image — what the image becomes in memory when executed. We can obtain container images in two ways:
  • a pre-existing image for a container registry (a repository of container images to which people can push images which can be pulled by others)
  • build your own locally
Once an image is present on a computer, it can be run to get an application running inside an OS container.
The Docker Image Format
  • De facto standard for images
  • made up of a series of layers of filesystem where each layers adds/removes/modifies files from the previous layer. It’s called an overlay filesystem.
Container images also have a configuration files which specify how to setup the env (networking, namespaces), the entry point for running the container, resource limits and privileges, etc.
The Docker image format = container root file system + config file
Containers can be of two types:
  1. System containers: like VMs, run a fool boot process, have system services like sshcron, etc.
  2. Application containers: commonly run only a single app
Building Application Images with Docker
Dockerfiles
It a file that automates the building of container images. Read more here . The book uses a demo app, the source code is available on GitHub. To run the kuar (Kubernetes Up and Running) image, follow these steps:
  1. Ensure you’ve Docker installed and running
  2. Download and clone the kuar repo
  3. Run make build to generate a binary
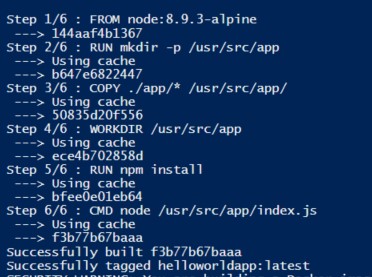
  4. Create a file named Dockerfile (no extension) containing the following:
FROM alpine
COPY bin/1/amd64/kuard /kuard
ENTRYPOINT [\”/kuard\”]
  1. Next, we build the image using the following command: $ docker build -t kuard-amd64:1 . The -t specifies the name of the tagTags are a way to version Docker images. the . tells docker to use the Dockerfile present in the current directory to build the image.
alpine as mentioned in the Dockerfile is a minimal Linux distribution that is used as a base image. More info can be found here.
Image Security
Don’t ever have passwords/secrets in any layer of your container image. Deleting it from one layer will not help if the preceding layers contain sensitive info.
Optimising Image Sizes
  • If a file is present in a preceding layer, it’ll be present in the image that uses that layer even though it’ll be inaccessible.
  • Every time a layer is changed, every layer that comes after is also changed. Changing any layer the image uses means that layer and all layers dependent on it need to be rebuilt, re-pushed and re-pulled for the image to work. As a rule of thumb, the layers should be ordered from least likely to change to most likely to change to avoid a lot of pushing and pulling.
Storing Images in a Remote Registry
To easily share container images to promote reuse and make them available on more machines, we use what’s called a registry. It’s a remote location where we can push our images and other people can download them from there. They’re of two types:
  1. Public: anyone can download images
  2. Private: authorisation is needed to download images
The book uses the Google Container Registry whereas I used the Docker Hub. After creating an account on Docker Hub, run the following commands:
  1. $ docker login
  2. $ docker tag kuard-amd64:1 $DockerHubUsername/kuard-amd64:1
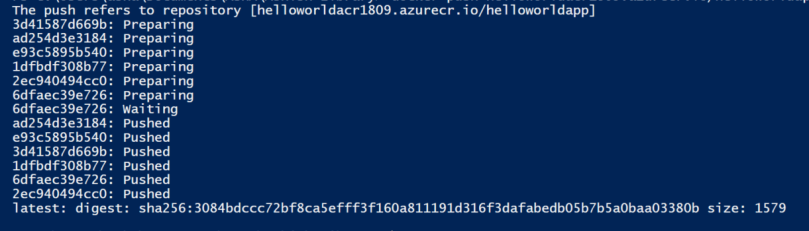
  3. $ docker push $DockerHubUsername/kuard-amd64:1 Replace $DockerHubUsername with your username.
The Docker Container Runtime
The default container run time used by Kubernetes is Docker.
Running Containers with Docker
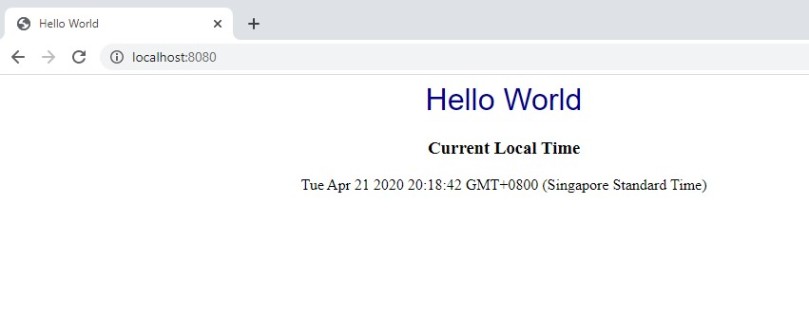
Run the following command to run the container that you pushed to Docker Hub in the previous step: $ docker run -d –name kuard -p 8080:8080 $DockerHubUsername/kuard-amd64:1 Let’s try to unpack everything that command does one thing at a time:
  • -d tells Docker to run the contain in detached mode. In this mode, the container doesn’t attach its output to your terminal and runs in the background.
  • —name gives a name to your container. Keep in mind it doesn’t alter the name of your image in anyway.
  • -p enables port-forwarding. It maps port 8080 on your local machine to your container’s port 8080. Each container gets its own IP address and doesn’t have access to the host network (your machine in this case) by default. Hence, we’ve to explicitly expose the port.
To stop & remove the container, run: $ docker stop kuard $ docker rm kuard
Docker allows controlling how many resources your container can use (memory, swap space, CPU) etc., using various flags that can be passed to the run command.
Cleanup
Images can be removed using the following command: $ docker rmi
Docker IDs can be shortened as long as they remain unique.