Install Horizon module in Sitecore 10

In this article, we will install Horizon module in Sitecore 10. To install Sitecore 10 using SIA, you can refer my this article: https://www.iamashishsharma.com/2020/08/install-sitecore-10-using-sitecore.html.

Refer the below steps to install Horizon module:

1. Download Horizon module from here.

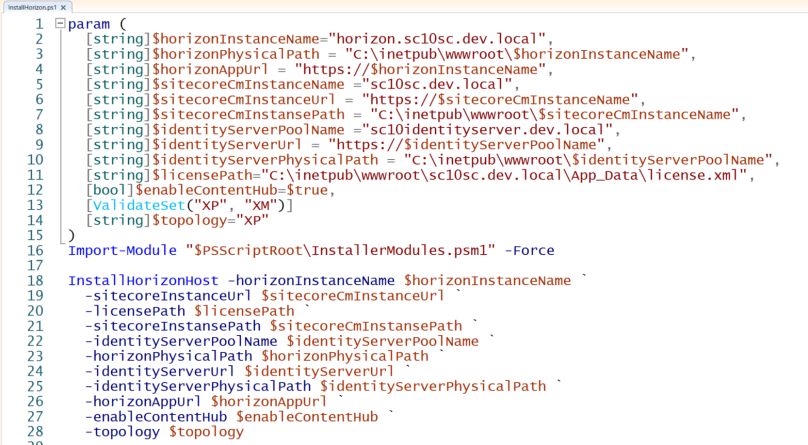
2. Extract the downloaded zip folder and then open InstallHorizon.ps1into Windows PowerShell ISE in administrator mode.

Update the variables

$horizonInstanceName: Name of Horizone instance

$sitecoreCmInstanceName: Name of the Sitecore instance created in IIS via SIA

$identityServerPoolName: Name of the Sitecore identity instance created in IIS via SIA

$LicensePath: Path to where your licence file can be found

$enableContentHub: To enable Content hub then set it as true

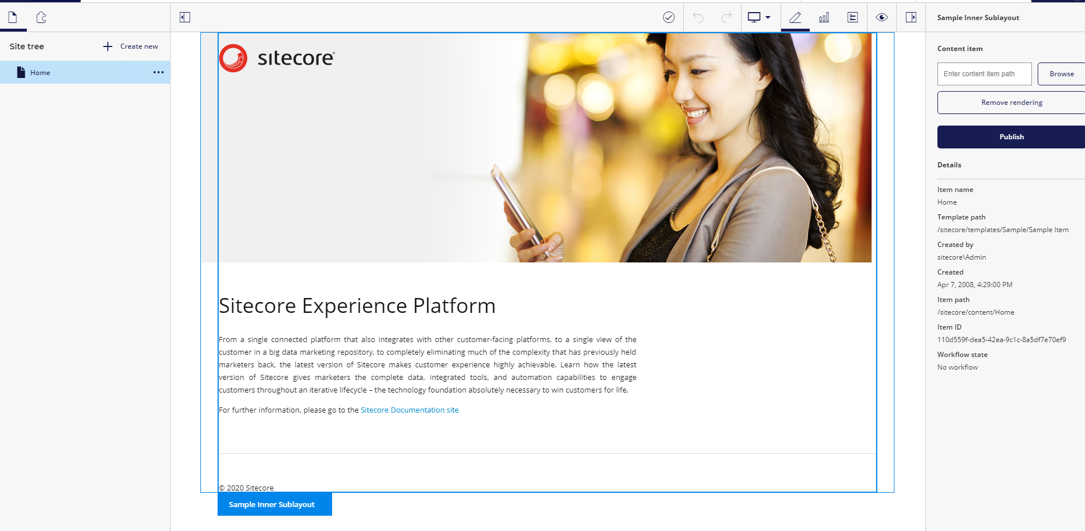
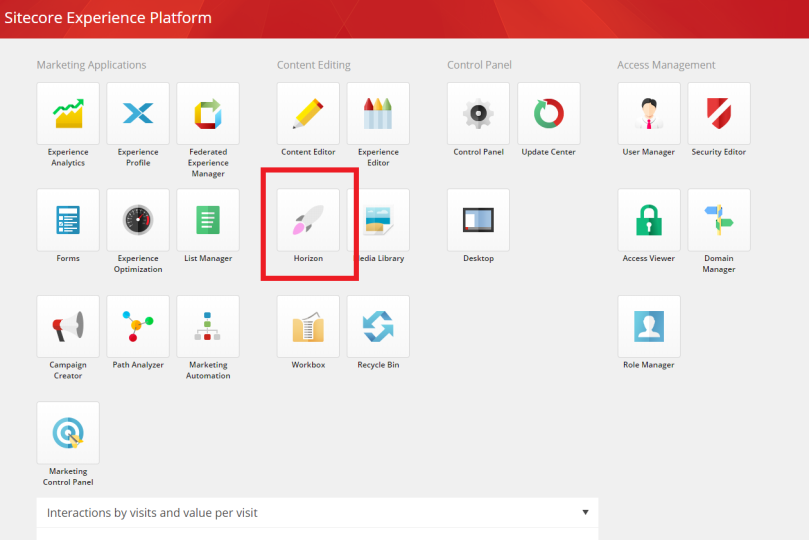
Once the script will be completed successfully, a new website horizon will be created. Login to Sitecore and you can see additional icon for horizon in launchpad. Click on the icon and you can see new Horizon website.

Install Sitecore 10 using Sitecore Install Assistant

This article will show the steps to install Sitecore 10 on your local machine using Sitecore Install Assistant.

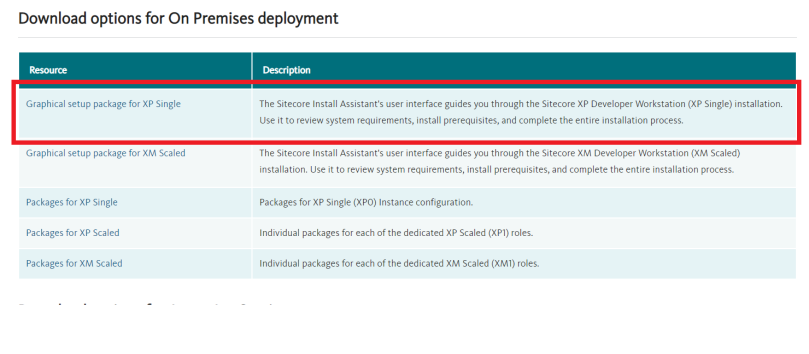
1. Go to dev.sitecore.net page and download Sitecore 10. I have downloaded XP single but you can choose other options as well for on premise.

2. Extract the downloaded zip folder and then run the \”setup.exe\” file with Administrator.

3. Click on Start button to start your installation.

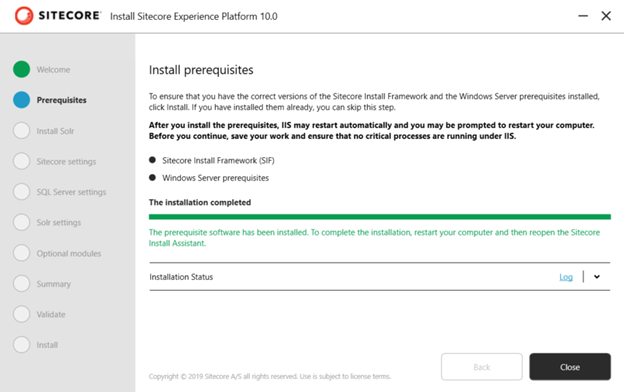
4. Install Prerequisites to make sure the required SIF and Windows Server prerequisites are up to date.

5. Enter Sol port, prefix and path to Install Solr.

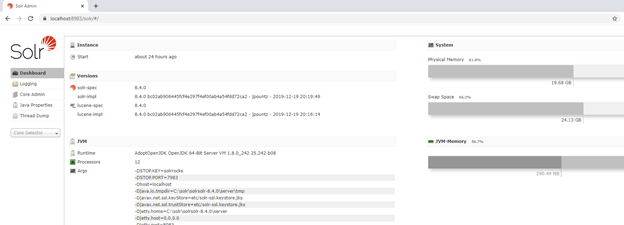
This will install Solr version 8.4.0. Browse your Solr url to make sure it’s running successfully.

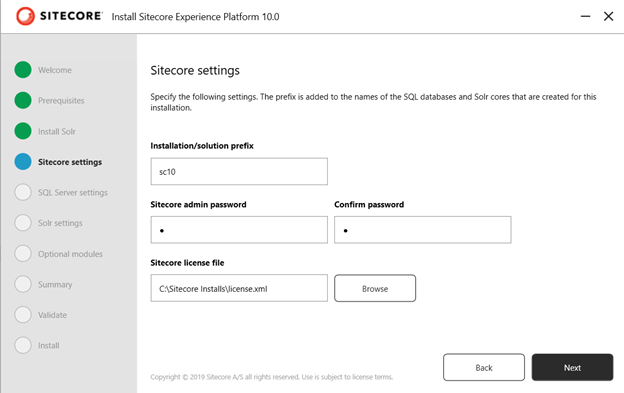
6. Enter your Sitecore prefix, password and browse Sitecore license file.

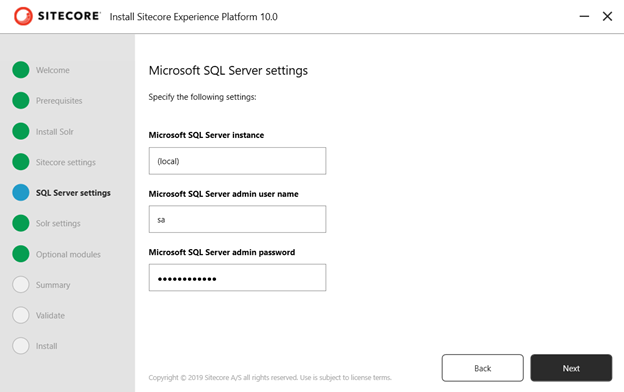
7. Enter SQL Server details.

8. Confirm your Solr details.

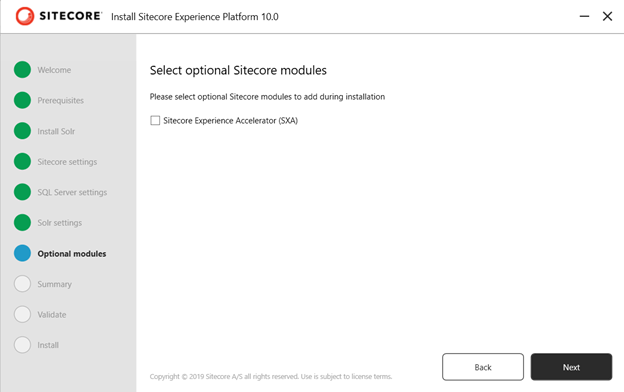
9. In case you want to install SXA then select this option.

10. Review the summary details and then click on Next button.

11. This step will validate all the parameters. Once all parameters will be validated, you can click on Install to start Sitecore installation.

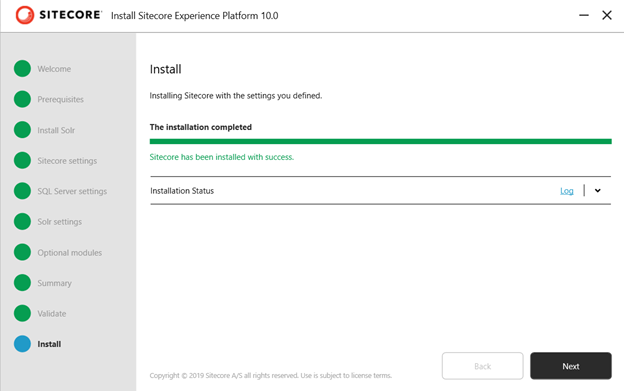
12. Once the installation will be completed, you can open the Sitecore instance.


Log into it by using account admin / Sitecore Admin Password)

If you have any feedback, questions or suggestions for improvement please let me know in the comments section.

Secure your Sitecore environment using Azure Private Link

Overview of Private Link:

A Private Endpoint is a special network interface (NIC) for your Azure Web App in a Subnet in your Virtual Network (VNet). The Private Endpoint is assigned an IP Address from the IP address range of your VNet. The connection between the Private Endpoint and the Web App uses a secure Private Link.

Private Link enables you to host your apps on an address in your Azure Virtual Network (VNet) rather than on a shared public address. It provides secure connectivity between clients on your private network and your Web App. By moving the endpoint for your app into your VNet you can:

1. Isolate your apps from the internet: Configuring a Private Endpoint with your app, you can securely host line-of-business applications and other intranet applications.

2. Prevent data exfiltration: Since the Private Endpoint only goes to one app, you don’t need to worry about data exfiltration situations.

Referemce: https://docs.microsoft.com/en-us/azure/app-service/networking/private-endpoint

If you just need a secure connection between your VNet and your Web App,  this is the simplest solution. If you also need to reach the web app from on-premises through an Azure Gateway, a regionally peered VNet, or a globally peered VNet, Private Endpoint is the solution.


Private Link vs App Service Environment: The difference between using Private Endpoint and an ILB ASE is that ASE can host many apps behind one VNet address while Private Endpoint can have only one app behind one address.

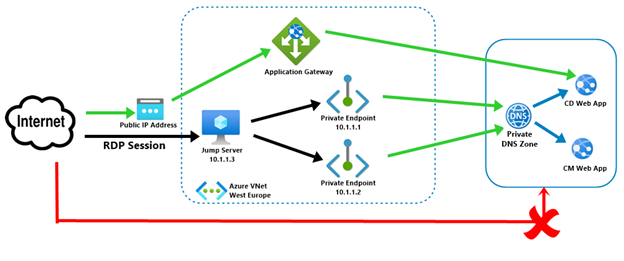
To access your Sitecore instances (CD or CM roles) in your VNet was previously possible via ILB App Service Environment or Azure Application Gateway with an internal inbound address. In this article, we will create Private Endpoint & isolate Sitecore environment from the Internet.

Once we will implement the above architecture, then:

1. Sitecore CD & CM web app’s public access will be disabled.

2. User can access CD instance via Application gateway public IP address. User needs to map his domain name with Application gateway.

3. To access CM instance, users need to use RDP session via Jump Server.


Follow the below steps to configure Azure Private Link for Sitecore web instances:

1. Go to CD instance’s App service plan & change the plan to P1v2. Currently, Private endpoint is only available in PremiumV2 plans.

2. Create Private Endpoint. Select your Subscription & Resource Group and then enter Endpoint name & select your location as shown below.

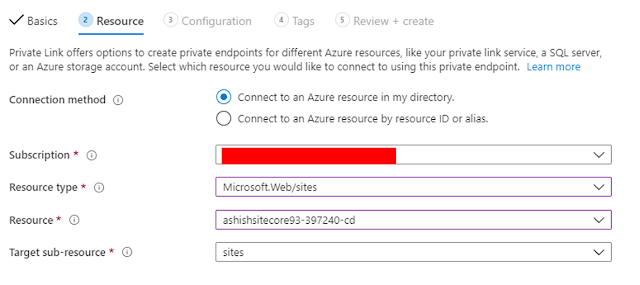
3. In Resource type, select Microsoft.Web/sites and then select your CD instance.

4. I already have Virtual Network, hence I have selected the existing virtual network. Then configure your Private DNS integration as illustrated below.

5. Perform the above steps (1-4) for CM instance.

6. Open your CD & CM instance in your browser. Now you will be unable to access CD & CM instances.

7. Create a virtual machine in same Virtual Network. Open the RDP port so that this VM can act as Jump Server.

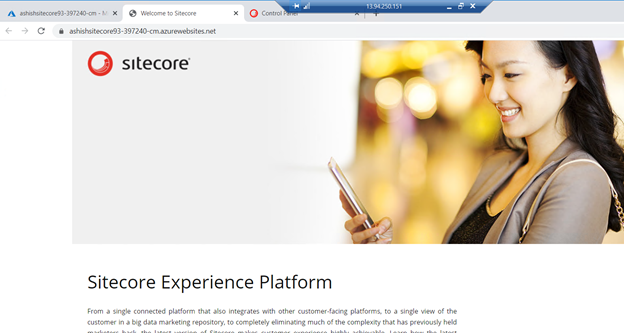
8. Once VM will be deployed, create a RDP session and browse your CD & CM instance. You should be able to access both CD & CM instances.


9. To access CD instance publicly, create an Azure Application Gateway.

9.1. Select the same Virtual Network that you have selected in above steps.

9.2. Create new Public IP address

9.3. In backend pool, select your CD instance.

9.4. Add routing rule. Create a listener and upload HTTPs certificate as shown below.

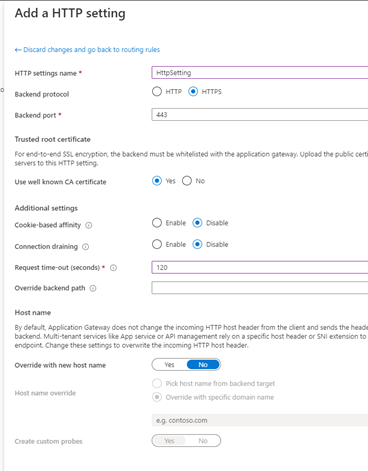
Create HTTP setting as illustrated below.
9.5. Once Application gateway will be deployed, check your backend health.

10. Navigate Application Gateway’s IP address in browser. You will be able to access CD instance publicly and your instance is secured by Private IP & your requests go through a Virtual Network.

I hope this information helped you. If you have any feedback, questions or suggestions for improvement please let me know in the comments section.

Publish items to a Preview Publishing target

Whenever there is a requirement to review the site changes before publishing it to live site. In this scenario, we need to enable normal view mode for our users, so that they can review changes before reaching to final state of workflow to publish to public site. This can be done using Sitecore\’s feature Preview Publishing Target. Adding a preview publishing target in Sitecore will allow your content approvers to preview it before making it available for whole world through your website.

Refer the below steps to configure preview publishing target:

1. Clone your CD instance. Refer this article which describes about how to clone your Azure web apphttps://www.iamashishsharma.com/2020/08/cloning-azure-app-services.html

2. Export your web database & import it named as preview-db in SQL Server.

3. Replace the web database connection string with preview database in CD instance. For example:

4. Add preview database connection string in CM instance


5. Add database node in Sitecore.config in CM instance inside databases node as refer below. (search in Sitecore.config)

  $(id)

      Images/database_web.png

      true


          publishing


        100MB

        50MB

        2500KB

        50MB

        2500KB


            $(id)


6. Then Add eventQueueprovider node inside eventing node (Search for ) 


7. Add propertystore in Sitecore.PropertyStore.config in CM instance


8. Create a new folder “Preview” inside  App_Config/Include folder. Then create new config Sitecore.ContentSearch.Solr.Index.Preview.config in App_Config/Include/Previewfor Solr preview indexing \”sitecore_preview_index\” in both CD & CM instance. Copy the below content in config file.


<configuration xmlns:patch="http://www.sitecore.net/xmlconfig/\” xmlns:role=\”http://www.sitecore.net/xmlconfig/role/\” xmlns:search=\”http://www.sitecore.net/xmlconfig/search/\”>


            preview

            true


            $(id)

            $(id)


                preview

                /sitecore


            false

            false


Perform in above step in both CD & CM instances.

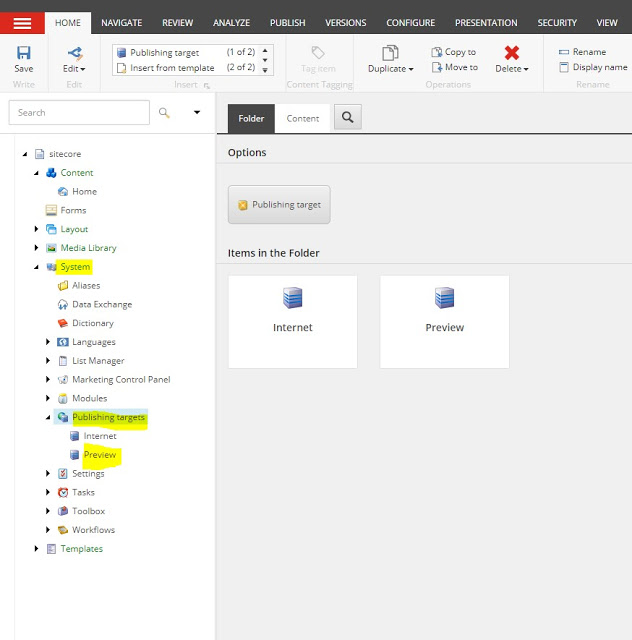
9. Now Login to CM instance-> Content Editor. Then go Sitecore\\System\\Publishing Targets & Create new Publishing target & add Target database \”preview\”.

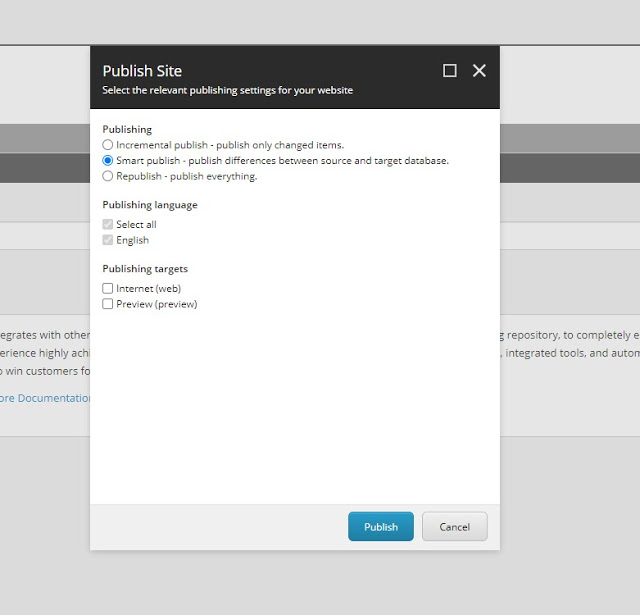
Then, validate the changes by publishing an item. It will also show “Preview” as publishing target.


10. Login to Solr and add new collection \”sitecore_preview_index and restart CM instance.

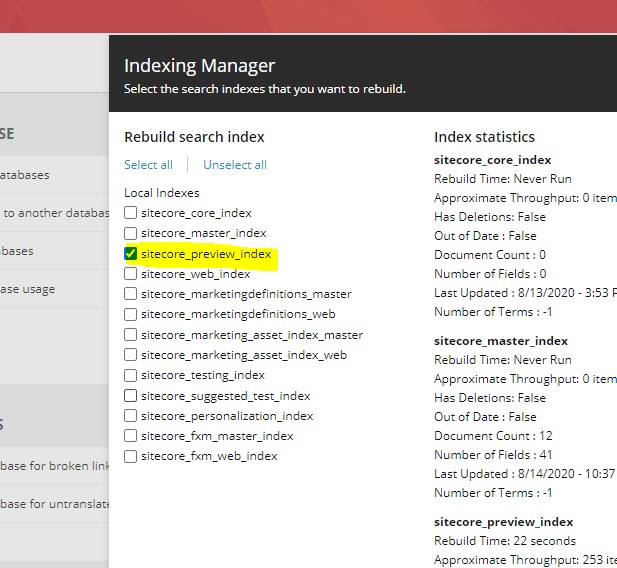
Validate the changes by rebuilding the search index. The index “sitecore_preview_index” can be shown as shown in below image.

I hope this information helped you. If you have any feedback, questions or suggestions for improvement please let me know in the comments section.
Cloning Azure App Services


Azure Web App Cloning is the ability to clone an existing Web App to a newly created app that is often in a different region. This will enable customers to deploy a number of apps across different regions quickly and easily.

Follow the below steps to clone your existing web app:

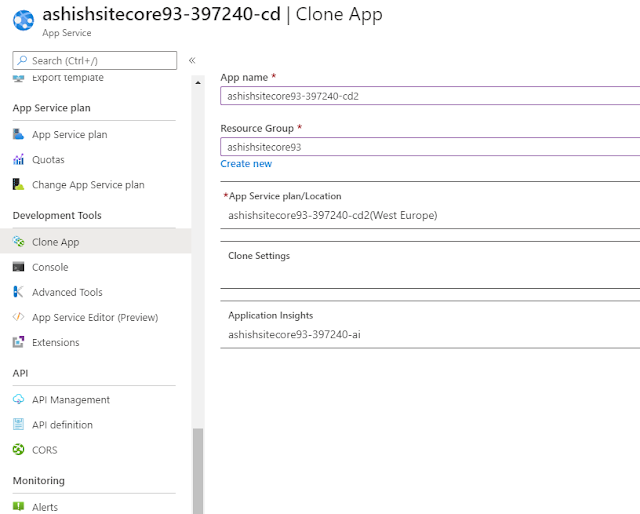
1. Go to App Service and click on Clone as shown below.

2. Enter your App name and select your Resource group.

3. You can select existing App Service plan or you can create a new one. Here, I have created a new App service plan in West Europe location of S1 Standard tier.

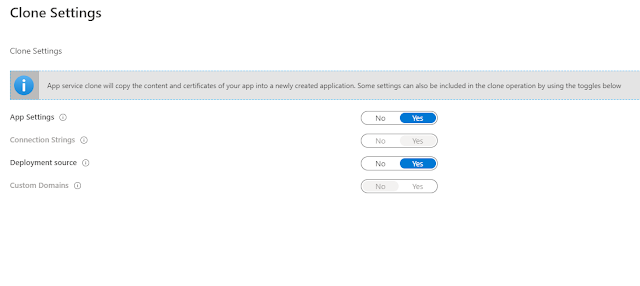
4. Click on Clone Settings & select the required settings you want to clone to new App service.

5. Select your existing Application Insights as illustrated below.

You can also create a new Application insight.

6. Click on Create, then your new App service will be created in few minutes.